In the procedure below we will create several macros that add a new menu and new menu item when a Help file is loaded. In particular, we will add a new menu called Programs that has a menu item called Excel. Selecting Excel will load Microsoft Excel.
1. Open your Help project.
2. Select the Project icon, then Help Targets from the left pane.
3. Select your WinHelp target from the right pane.
4. From the property pane, click the WinHelpMacro property.
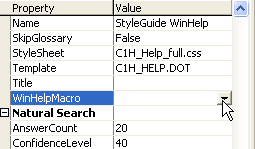
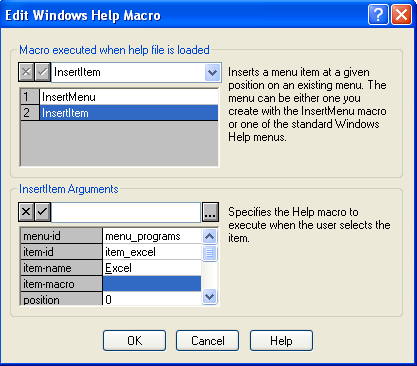
The Edit Windows Help Macro dialog opens.
5. From the drop-down list box in the Macro executed when help file is loaded area, select InsertMenu.
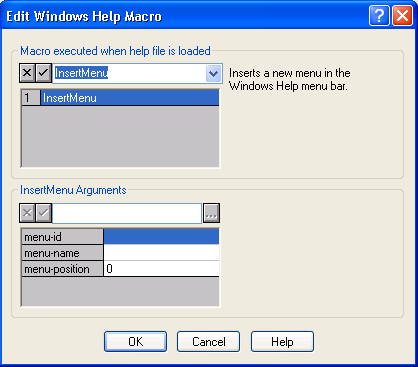
6. Select the menu-id box and type menu_programs in the textbox at the top of the InsertMenu Arguments area. This is the name you use to identify the menu. It can be any unique identifier. You can also add items to Help's Standard menus.
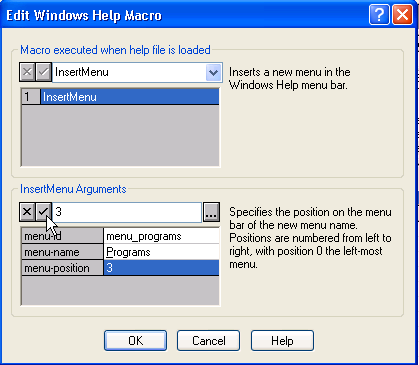
7. Select the menu-name box and type &Programs in the textbox at the top of the InsertMenu Arguments area. This is the text that you want to appear on the menu. The character following the ampersand is the hotkey.
8. Select the menu-position box and type 3 in the textbox at the top of the InsertMenu Arguments area. This specifies the position on the menu bar of the new menu name. Positions are numbered from left to right, with the leftmost being position 0.
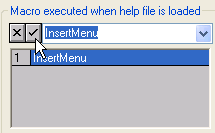
9. Click the InsertMenu Arguments checkmark button.
10. In the Macro executed when help file is loaded click the checkmark button. A new blank cell opens beneath the InsertMenu macro.
At this point we have added a new menu called Programs which will appear to the right of the Bookmark menu. In the next series of steps we will add the menu item Excel that when clicked will run Microsoft Excel.
11. From the drop-down list box, select InsertItem for the second cell.
12. Select the menu-id box and type menu_programs in the textbox at the top of the InsertItems Arguments area. This must be a unique identifier to identify the menu or one of the names Help uses to identify its standard menus (if you're adding to a standard menu).
13. Select the item-id box and type item_excel in the textbox at the top of the InsertItems Arguments area. This is the label Help uses internally to identify the menu item. Use any label, but it must be different from any other item-id you have used.
14. Select the item-name box and type &Excel in the textbox at the top of the InsertItems Arguments area. This will place the word Excel on the Programs menu and make the letter "E" its keyboard shortcut.
15. Select item-macro, then click the ellipsis button.
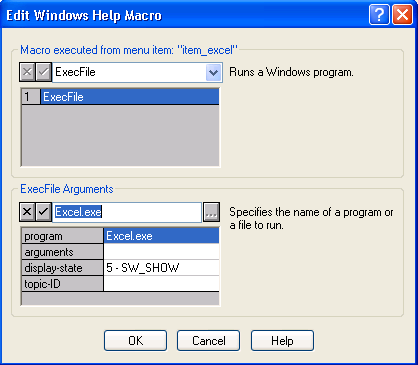
A second Help Macro dialog box appears. You have to specify which macro you want executed when the user clicks on the menu item Excel. In this example, when the menu item is clicked, Excel loads. This second dialog box allows you to specify the macro and arguments you want executed when the user clicks the Excel menu item.
16. From the drop-down list box in the Macro executed from menu item: item_excel area, select ExecFile.
17. Type Excel.exe in the textbox at the top of the ExecFile Arguments area and click the checkmark button.
18. Select the display-state box, and from the drop-down at the top of the ExecFile Arguments area, select the value, 5 SW_SHOW.
Your dialog should look like the example below.
19. Click OK. The first Help Macro dialog box reappears and the ExecProgram macro appears in the item-macro box in the InsertItem Arguments section.
20. In the position box, type 0. This is the number specifying where the new menu item will appear. The number must be an integer. The first item on a menu is represented by 0, the second item is 1, and so forth. So in this example the Exec will be the first item in the Programs menu.
21. Click the checkmark button in the InsertItem Arguments area. This completes the arguments.
22. Click the checkmark button in the Macro executed when help file is loaded area. This completes the macro definition.
23. Click OK. Doc-To-Help adds the appropriate macro to your Help Project File (HPJ File).
24. Build your WinHelp file.
25. Open your WinHelp file and test the menu.