1. In Word, position your cursor where you want the reference to appear.
2. Type the referring text, such as "For more information, see" or "See also" followed by a space.
3. Click the
Insert Cross Reference button ![]() on the Doc-To-Help toolbar.
The Cross Reference dialog box opens.
on the Doc-To-Help toolbar.
The Cross Reference dialog box opens.
4. Set the Reference Type set to Heading.
5. Set Insert Reference To to Heading Text.
6. Select the heading you want to refer the reader to.
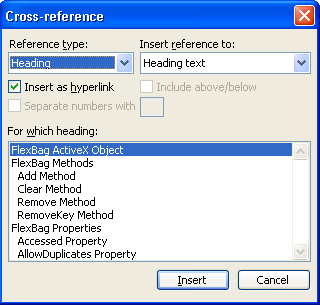
7. Click the Insert button. The heading text is inserted.
8. Click the Close button.
9. With the
insertion point immediately following the cross-reference (reference field),
click the Complete Cross Reference button ![]() on the Doc-To-Help toolbar.
on the Doc-To-Help toolbar.
The page reference is inserted and the heading text is enclosed in quotes.
10. Type a period after the page number, if necessary.
Alternatively, you can perform the same steps with the Insert|ComponentOne Doc-To-Help|Cross Reference and the Edit|Complete Cross-reference menu commands.