1. On the Project menu, click Organizer. The Organizer dialog box opens.
2. In the Show elements list, select Styles.
3. Click Open File on the right side of the Organizer to display a file selection dialog box.
4. Specify a folder and file name for the existing project, then click Open.
The list on the right side of the Organizer dialog box now contains all styles in the specified project. Initially, none of the styles are selected, and the Copy button is unavailable.
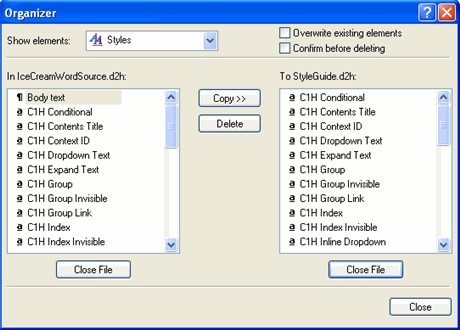
By default, like-named styles are not copied from one project to another. If desired, check the Overwrite existing elements box to force the Organizer dialog box to re-import existing styles.
5. Select one or more styles in the list on the right, then click Copy. When you are finished, click the Close button at the lower right corner of the dialog box.
When a style is copied from one Doc-To-Help project to another, it retains all of its attributes, including any script or window associations. If necessary, the Organizer dialog box also copies the appropriate script module and/or window definition. The Overwrite existing elements setting also applies to scripts and windows associated with a style.
Note that you can also use the Organizer dialog box to export styles in the active project to another Doc-To-Help project. When you select one or more styles in the list on the left, the direction of the copy operation is reversed and the list captions change accordingly.