1. Click the Create New Project hyperlink on the Doc-To-Help Start page or select File | New within the Doc-To-Help project editor. The first screen of the New Project Wizard opens.
2. Using the Browse button to open the New Project dialog box, create or choose a directory and enter a project name in the File name textbox.

3. After you have created the new directory and entered the project name click Save, then Next.
4. Select the type of source documents you want to use in your project. You have three options:
Microsoft Word documents
Mixed documents
HTML documents
See Doc-To-Help 2007 Source Documents for more information on the source documents that can be used with Doc-To-Help.
5. Click Next.
6. If you selected Microsoft Word documents, you can skip this step. If you selected Mixed documents or HTML documents, you are prompted to select the Doc-To-Help Style Sheets you want to use with the HTML documents:
Full set of styles should be used if you want to use some or all of the styles provided with Doc-To-Help in your HTML documents.
Minimal set of styles should be used if you want to use your own style sheets and the minimal set of styles necessary for Doc-To-Help functionality.
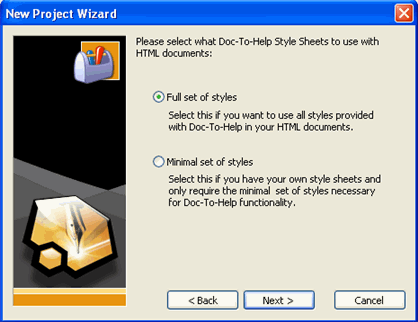
7. Choose one of the options and click Next.
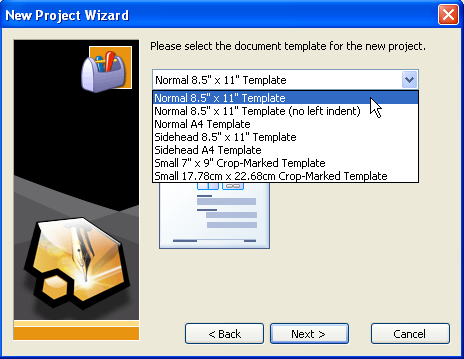
8. From the drop-down list, choose the template that you wish to attach to your new project and click Next.
9. From the list of Help targets, choose your default Help target and click Next. Though you can build any Help target for your project, this determines the target your project compiles initially.

10. If Mixed documents was selected in step 5, the wizard asks the type of empty initial document you want Doc-To-Help to create. Select one of the following options and click Next:
Microsoft Word document
HTML document
Empty project, no initial documents. If you choose not to create an initial document, you can always add documents to your project later.
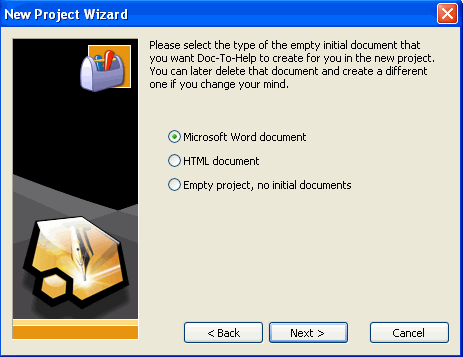
Note: A glossary document of the same type as the empty initial document is also created and added to your project. If Empty project is selected, no glossary document is created.
11. Review your directory location and file name and click Finish.
The Doc-To-Help Wizard produces a new Help file and opens the project editor. If you specified Microsoft Word documents for your project or the type of initial document, a start-up document is opened in Microsoft Word and you can begin composing your documentation.
Note: The Word document is placed in the WordDocuments folder within your project folder. It is recommended that you keep all Word source documents for the project in this folder.
If you specified HTML documents for your project or the type of initial document, a New Document dialog box appears. Enter a name for your document and click Save. The Adding New HTML Document dialog appears:
Select Single topic or Multiple topics.
Enter a title for the first topic in the Title text box.
If Single topic was selected, choose a Document Style from the drop-down box.
Click OK.
An HTML page is opened in your default HTML editor and you can begin composing your documentation.
Note: The HTML document is placed in the HTMLDocuments folder within your project folder. It is recommended that you keep all HTML source documents for the project in this folder.