1. Create a directory named Source in a convenient location. This folder is used to store your .DLL and .XML files for the purposes of this tutorial.
2. Copy the C1.Win.C1BarCode.DLL file and C1BarCode.XML file from C:\Program Files\ComponentOne\DocToHelp\Tutorial\BarCode\BarCode Assembly\Original to your Source directory.
3. Start ComponentOne Doc-To-Help and select the Open Doc-To-Help Documenter for .NET option from the main screen.
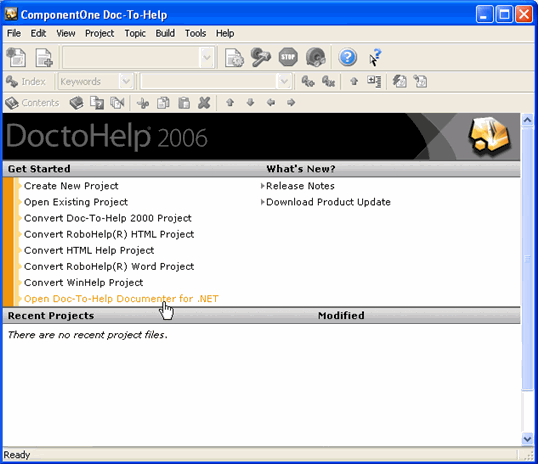
This will bring up the Documenter start dialog, where you can select to create a new project or open an existing one.
4. Click the New Project button, then select a name and location for the new documentation project.
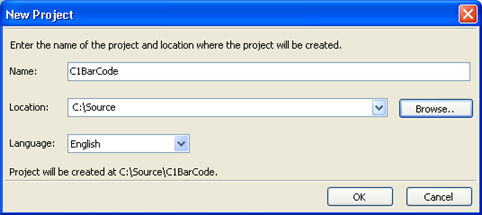
5. Click OK and the new project will be created at the location you specified.
The Files dialog will prompt you for the assemblies you want to document and the location of the optional XML documentation file created by the C# compiler.
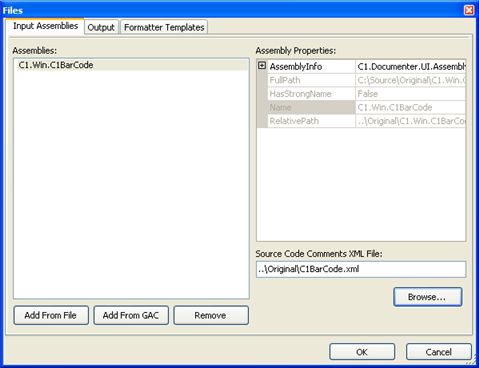
By default, the output document file uses the same name as the project. If you want to modify the name of the output document, select the Output tab and modify the document name in the Generated Document|Name textbox.
6. Click Add From File and select C1.Win.C1BarCode.dll from your Source directory.
Note: You have the option to add from the Global Assemblies Cache (GAC). By clicking Add From GAC, Documenter exposes all assemblies stored in the local GAC. "Strongly Named" assemblies must reside in the GAC to be documented.
7. Under Source Code Comments XML File, click Browse, select C1BarCode.xml from your Source directory and click Open.
8. After selecting the assembly and .XML file, click OK.
Documenter opens a second dialog that allows you to specify which elements you want to include in the documentation.
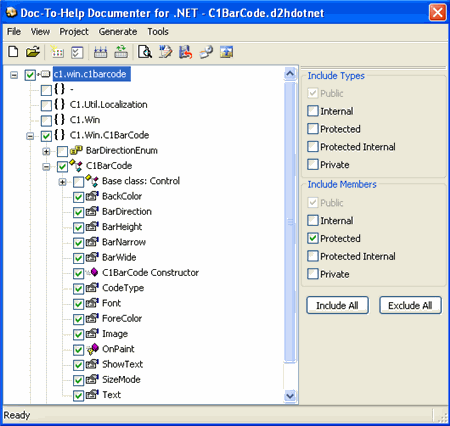
Note that in this case, we unchecked the node that contains the base class. That was done because C1BarCode inherits from the .NET Control class, and that is documented in MSDN. We will only document the members that are declared in our own assembly.
9. Once you have selected the members you want to document, choose the Generate | Generate New Document menu option. Documenter creates the Doc-To-Help project files. This may take a few minutes, depending on the size of the files. You can then use the Tools menu to view a list of elements without a description, incorrect user changes or invalid XML comments.
10. Click Close. The Doc-To-Help Project Editor opens, with the new project loaded.